Letter Overview
- Determine the structure of the letter by adding or removing regions.
- Create the text to be included in the letter.
- Insert conditional paragraphs in your letter.
- Place lines, frames, pictures, and borders.
- Order and select the records that appear in the letter.
- Using the Letter Genie
- Using the Letter Editor
- Formatting RTF Objects
- Creating Long Letters
Description
Using the Letter Editor, you can create a customized letter layout that takes data from a table or set, and merges it with text that you create to generate customized form-letters. For example, you have a set which keeps track of invoices, and you want to create a personalized letter to new customers to thank them for their business. This can be done by creating a letter layout.
By merging data from the set, each letter addresses an individual customer by name, and gives them information about their past history with your business. A Letter layout can also contain conditional paragraphs that let you include sections based on data in a table or set. For example, for customers whose memberships have expired, your letter might have a conditional paragraph that reads, "Our Records show that your membership has expired. If you renew now, you can take advantage of our special renewal rates." To create a Letter from the Control Panel :
Display the Letter tab.
Click the New button.
The New Object Genie appears and guides you to the Letter Editor.
You can either use the Letter Genie, which prompts you step by step to help you create your Letter, or you can go directly to the Letter Editor.
The basic Letter design process consists of adding or removing sections to the letter to define its overall structure, typing in the text you want to include, adding fields and conditional commands, and determining the order and selection of the records that print. For more information on the various parts of this process, refer to the list below.
Determine the structure of the letter by adding or removing regions.
The overall structure of a letter is divided into regions. Regions are where the objects of a letter are actually placed on the layout. Alpha Anywhere lets you create page header and footer regions, a Letterhead head region, and continuation header and footer regions.
Create the text to be included in the letter.
You can type the body text of a letter, and place fields from the Drag-and-Drop List into that text to create customized letters for each record.
Insert conditional paragraphs in your letter.
You can use conditional commands to include or exclude parts of your letter based on data from the table or set. This provides a dynamic way to customize your Letter.
Place lines, frames, pictures, and borders.
To make your letter more aesthetically pleasing, you may wish to include your company logo in the Letter Head section, or insert frames or lines to visually group or divide parts of the letter.
Order and select the records that appear in the letter.
You can order and filter the records that appear in the letter by storing order and selection criteria in the Letter, by letting the user decide at print time, or by using a combination of the two.
Using the Letter Genie
Display the Letters tab of the Control Panel.
Click New to display the New Letter dialog.
Select a table or set and click OK.
When the Form Letter Genie appears, click OK.
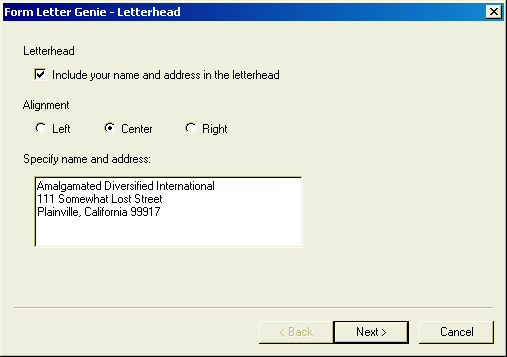
Optionally, clear the Include your name and address in the letterhead check box. If you leave it checked:
1. Select how you want the letterhead aligned.
2. Enter the text to appear in the Specify name and address text control.
Click Next >.
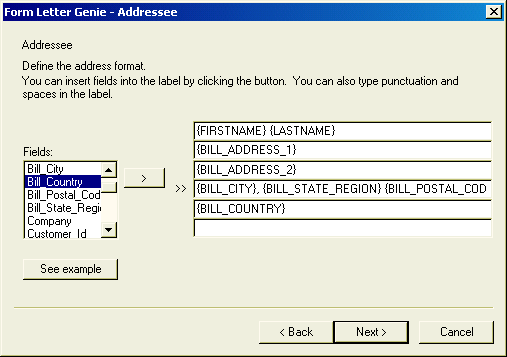
Define the address format. Fill in the lines of the address with constant text, punctuation, and field names. To add a field name, select it from the Fields list and click the '>'.
Click Next >.
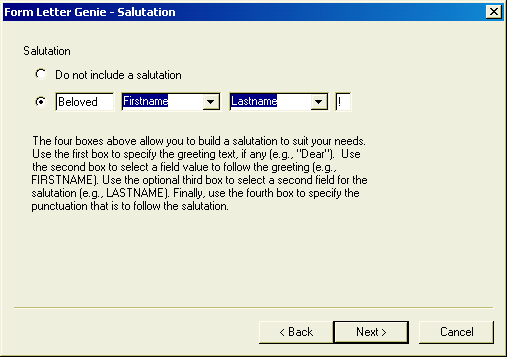
Define the salutation. Optionally select Do not include a salutation. If you include a salutation:
1. Optionally, clear or edit the first text control, which defines constant text to appear at the beginning of the line.
2. Select a field from the first listbox control.
3. Optionally, select a second field from the second listbox control.
4. Optionally, clear or edit the text that appears at the end of the line.
Click Next >.
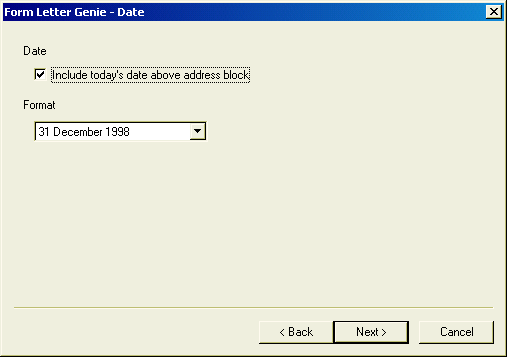
Optionally, define a date to place above the address block. If you choose to include a date, select a format from the Format list.
Click Next >.
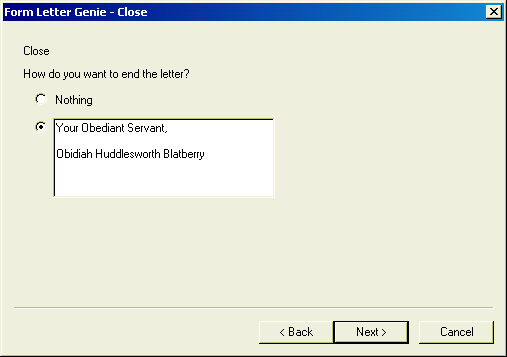
Optionally, define an ending line or paragraph of text.
Click Next >.
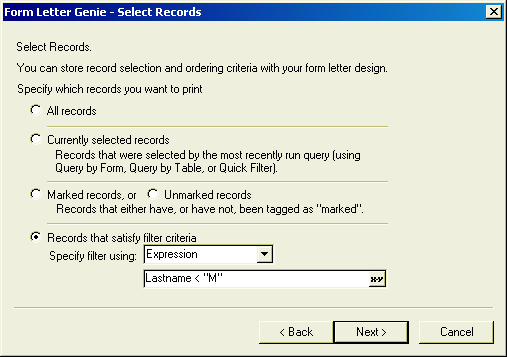
Select the records you want to print. The options are:
1. All records
2. Currently selected records: records that were selected by the most recently run query (using Query by Form, Query by Table, or Quick Filter).
3. Marked or Unmarked records
4. Records that satisfy filter criteria
If you chose to use a filter expression, you have 2 choices:
"Expression" - which requires you to write an expression that evaluates to a logical value (true or false).
"Saved Query"
If you selected "Expression" in step 16, you may either write an expression in the field below or click to display the Expression Builder.
If you selected "Saved Query" in step 16, select a saved query from the listbox below.
Click Next >.
Optionally, define the order in which to print the letters. Select up to 3 fields to use to sequence the records. Click the A...Z buttons to sort records in either ascending or descending value.
Click Next >.
Optionally, select Preview how the form letters will print and click Finish.
Otherwise, select View the form letter design and click Finish. This bring you to the Letter Editor.
Using the Letter Editor
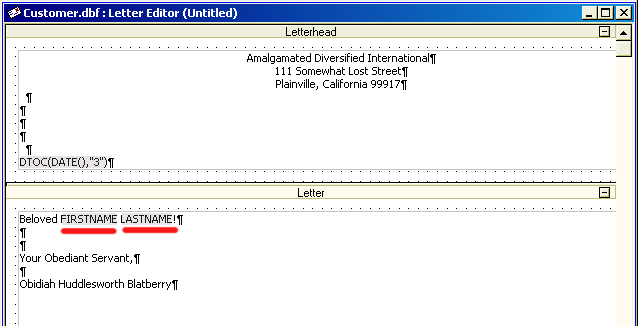
If you used the Form Letter Genie up to this point you will see the following. The text that you see has been placed in 2 Rich Text Formatted (RTF) objects. Note how the FIRSTNAME and LASTNAME fields are embedded in the letter.
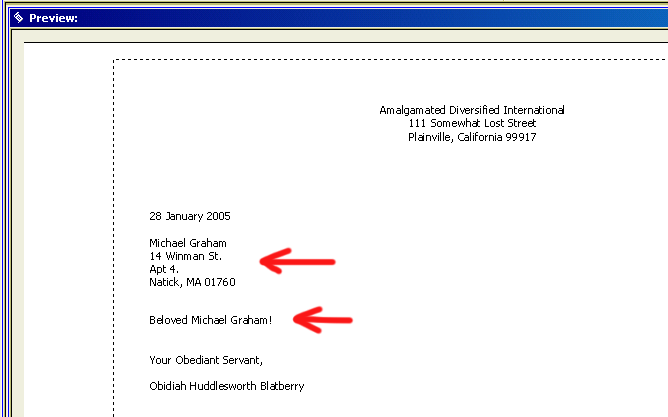
Click the following button on the toolbar and you will see that the letter is reading values from the table, but is lacking content. Picture
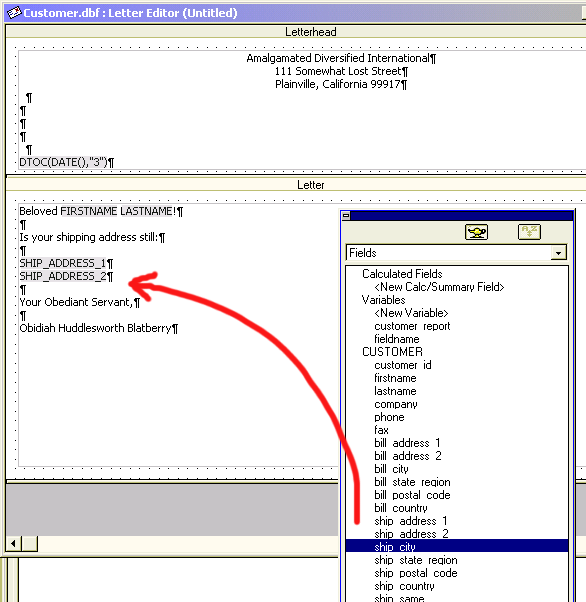
Adding text content is as easy as placing the cursor in the RTF object and typing it in. To add a field to the letter drag it from the Drag and Drop List to the desired location in the letter.
When you release the field in the desired location, the Summary Field Genie may appear. Simply click Finish. When you are done designing the letter, click, name your letter, and click OK.
Formatting RTF Objects
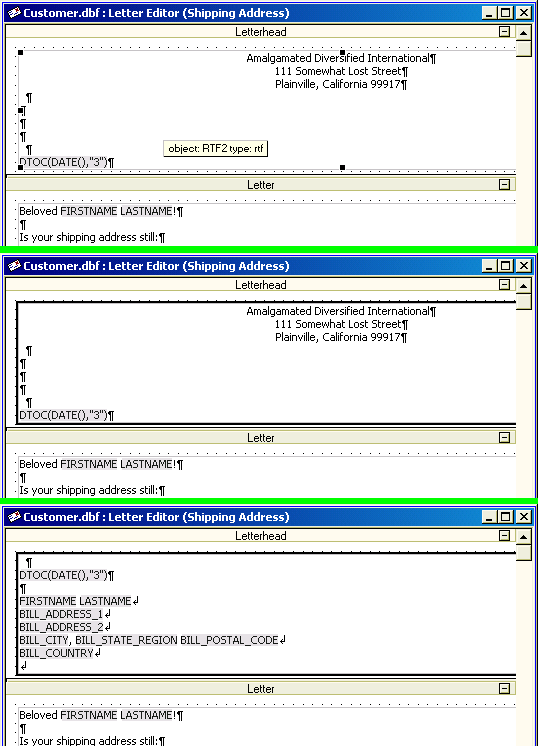
The following three views of the top of the letter illustrate additional properties of the Letter Editor.
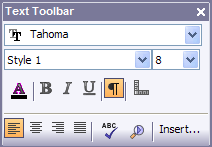
The top image shows the letterhead's RTF object selected. Note the small black squares that appear at the corners and at the middles of the sides of the object. At this stage you can move and resize the object. This is the default and minimum size of the RTF object. The middle image shows what happens when you double-click on an RTF object. Now there is asolid black outline. At this stage you can format the contents of the RTF object. The Text Toolbar automatically appears.
The third image shows what happens when you cursor downwards. Additional text appears. This illustrates a valuable property of RTF objects. When you print them, they automatically expand to display all their contents. But if there were no additional contents beyond what you see in the top image, then the object would print with that default size. If you click the Insert... button of the Text Toolbar, the RTF Insert Command toolbar appears. This toolbar allows you to place conditional text into your letter. For more information, refer to Rich Text Editor.
Creating Long Letters
Letter layouts are limited to 24 inches in length. However, if you put a Rich Text Object into a letter and enable the "Allow growth when printing" property, the final printed letter can be much longer in length.
